Metallography: Part Two
Abstract
The technique for preparing metal sections can be divided into two groups, those processes involving the use of emery papers and coarse abrasives (grinding) and the subsequent operations using fine abrasives (polishing treatments).
Compression-type molding is commonly applied to encase specimens in 1 to 1.5 inch diameter plugs of a hardened polymer.
Metallography consists of the study of the constitution and structure of metals and alloys. Much can be learned through specimen examination with the naked eye, but more refined techniques require magnification and preparation of the material's surface. Optical microscopy is sufficient for general purpose examination; advanced examination and research laboratories often make use of electron microscopes (SEM and TEM), x-ray and electron diffractometers and possibly other scanning devices.
Incorrect techniques in preparing a sample may result in altering the true microstructure and will most likely lead to an erroneous conclusion.
Stages of Preparation (Definitions)
The most straight-forward approach is to divide the entire process into a logical series of stages involved in sample preparation:
Stage 1: Sectioning
The removal of a representative sample from the parent piece.
Stage 2: Coarse Grinding
Producing an initial flat surface.
Stage 3: Mounting
Embedding the sample in a hot thermosetting powder or cold castable mounting material for ease in manipulation and other factors such as fragility, edge preservation, etc. This stage is sometimes omitted for certain methods of preparation or in instances where it would serve no purpose.
Stage 4: Fine Grinding/Pre-Polishing
Removing the zone of deformation caused by Sectioning and Coarse Grinding. The depths of deformation during this stage need to be limited by proper abrasive size sequencing.
Stage 5: Rough Polishing
Further limitation of the deformation zone produced by Fine Grinding.
Stage 6: Final Polishing
Removal of deformation zone produced during Rough Polishing. Any zone produced at this stage should be minimal and generally will be removed during etching.
Some of the fore mentioned stages will now be discussed in more detail.
Preparation of Specimens
The technique for preparing metal sections can be divided into two groups, those processes involving the use of emery papers and coarse abrasives (grinding) and the subsequent operations using fine abrasives (polishing treatments). Grinding must be carried out carefully in such a way that all microscopic constituents in the surface are preserved and that the grinding medium is not embedded in the sample.
To achieve this, the specimen is ground on successively finer grades of emery (sand) paper. During grinding, the specimen is held with the newly formed scratches at right angles to the scratches introduced on the preceding paper. Undue pressure should be avoided since the disturbed layer this produces on the surface can extend to considerable depth. For some heat treated alloys and in particular for many of the soft metals, it is an advantage to use paper thoroughly wetted.
Grinding also removes surface deformations. After grinding, the specimen is washed thoroughly in water and then polished. Mechanical polishing can best be carried out by holding the specimen against a rotating disc covered with a suitable pad that is impregnated with either a suspension of polishing alumina in water or diamond dust oil.
Mounting of Specimens
Small samples are generally mounted in plastic for convenience in handling and to protect the edges of the specimen being prepared. Compression-type molding is commonly applied to encase specimens in 1 to 1.5 inch diameter plugs of a hardened polymer. Compression molding materials are classified as either thermosetting or thermoplastic:
1) Bakelite is a low cost, relatively hard thermosetting polymer that is commonly utilized.
2) Expensive Transoptic Thermoplastics are utilized when transparency is required.

Figure 1: Hot mounting: The specimens are placed in the mounting press, and the resin is added. The specimens are mounted under heat and high pressure.

Figure 2: Cold mounting: The specimens are placed in a mounting cup and mounting material is then poured over the specimens. A vacuum impregnation unit (photo) is used for mounting of porous materials.
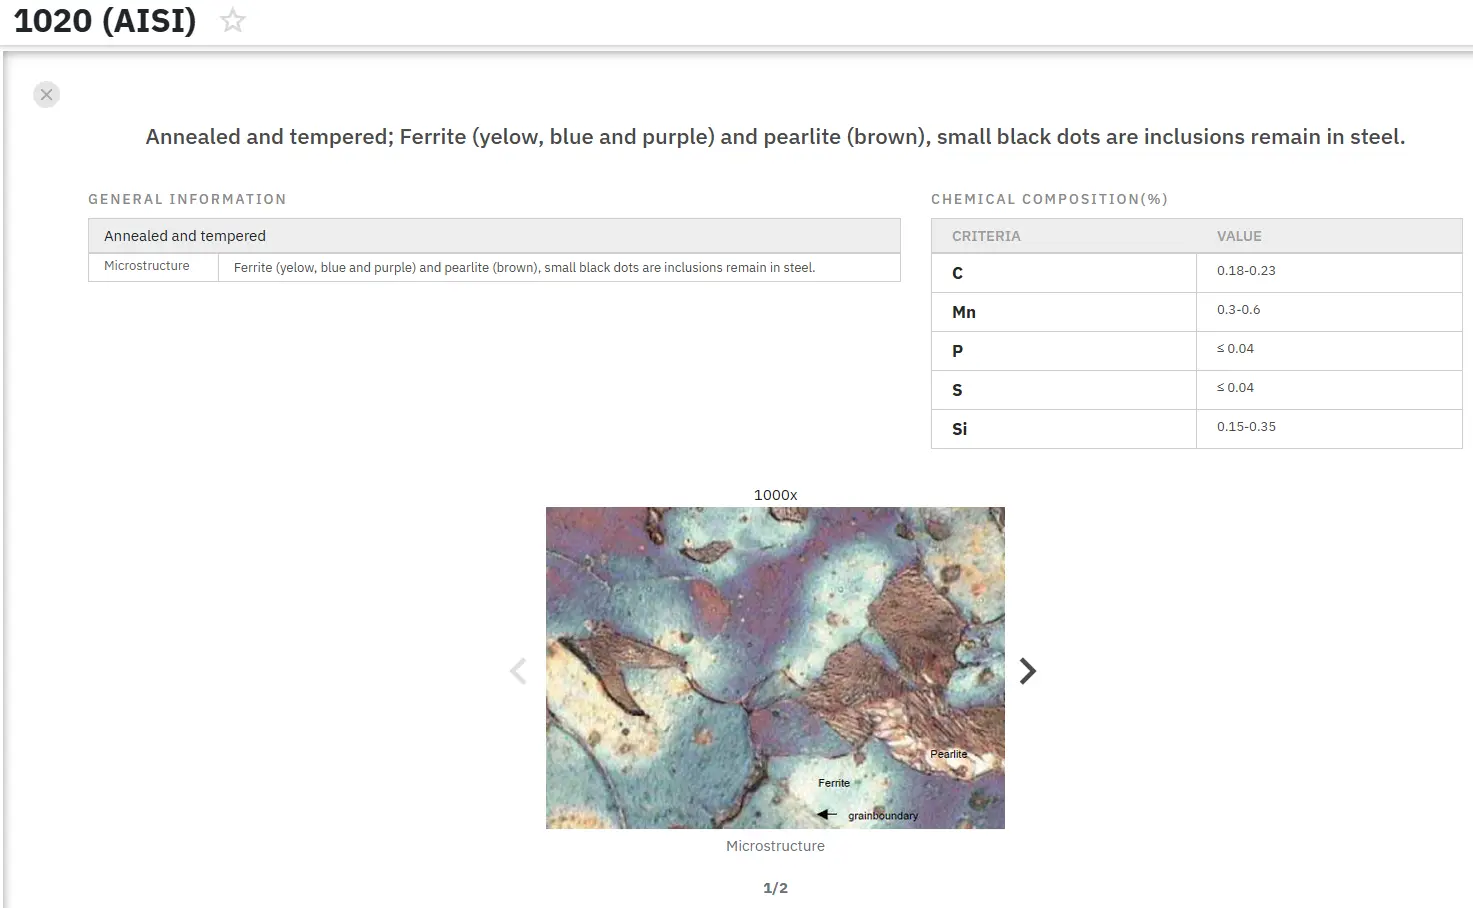
Find Instantly Thousands of Metallography Diagrams!
Total Materia Horizon contains a unique collection of metallography images across a large range of metallic alloys, countries, standards and heat treatments.
Get a FREE test account at Total Materia Horizon and join a community of over 500,000 users from more than 120 countries.