Engineering Stress-strain Curve: Part One
Abstract
When subjected to tensile forces, the engineering stress-strain curve is a critical representation of a material's mechanical properties. By plotting stress against strain, this curve helps in understanding key attributes such as material strength, elasticity, and ductility. The curve is divided into distinct regions, with the initial elastic zone where stress and strain are proportional, followed by plastic deformation where permanent changes occur. Critical parameters like yield strength, tensile strength, and elongation are extracted from this curve, providing valuable insights for material selection and engineering design. Factors such as material composition, heat treatment, and testing conditions all influence the shape and characteristics of the curve. This tool is essential in evaluating material behavior for applications requiring specific mechanical performance.
Introduction
The engineering stress-strain curve is a vital aspect of materials testing, providing crucial data for material selection and design. This curve is constructed by applying a uniaxial tensile force to a specimen while simultaneously measuring its elongation. The resulting curve is essential in determining several key properties of materials, including strength and ductility.

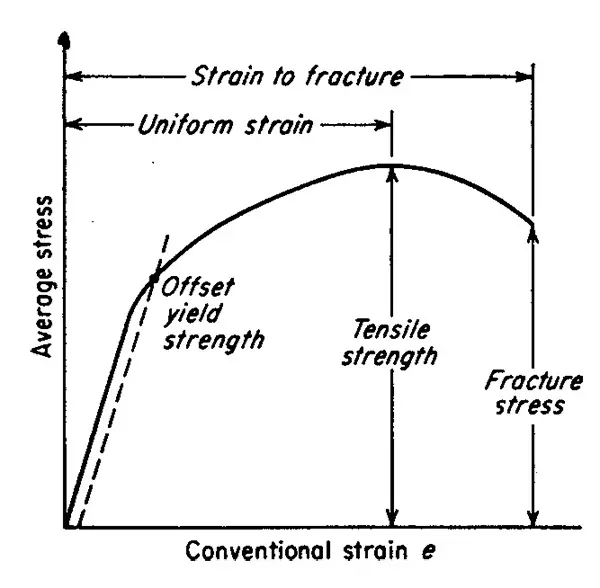
Figure 1. The engineering stress-strain curve
It is obtained by dividing the load by the original area of the cross-section of the specimen.

The strain used for the engineering stress-strain curve is the average linear strain, which is obtained by dividing the elongation of the gage length of the specimen, d, by its original length.

Stress and Strain Definitions
In the context of the engineering stress-strain curve, stress is defined as the applied load divided by the original cross-sectional area of the specimen. Strain is the elongation of the specimen divided by its original length. These two parameters allow the construction of the stress-strain curve, which can be used to assess the mechanical performance of a material.
Factors Affecting the Stress-Strain Curve
The shape and magnitude of the stress-strain curve depend on several factors:
- Composition: Different alloying elements can significantly affect a material's mechanical properties.
- Heat Treatment: Materials that have undergone different heat treatments will show distinct stress-strain behavior.
- Prior History of Deformation: A material's previous processing or deformation history can influence its response to stress.
- Testing Conditions: Variables such as strain rate and temperature can alter the curve's shape.
The Elastic Region and Plastic Deformation
In the elastic region of the curve, stress is proportional to strain, and the material will return to its original shape when the load is removed. Once the material exceeds its yield strength, it undergoes plastic deformation, which is permanent. As the load continues to increase, the material begins to strain-harden, meaning that more force is required for further deformation. However, eventually, the specimen begins to neck, which causes a localized reduction in cross-sectional area, and the stress begins to decrease until fracture occurs.
Tensile Strength
Tensile strength (or ultimate tensile strength) refers to the maximum load a material can withstand before failure.

Although this value is often quoted in engineering applications, it is not always the most relevant measure of material strength, particularly for ductile materials. For design purposes, yield strength is typically a more reliable parameter, as it reflects the material's ability to perform under more realistic loading conditions.
Yielding and Related Concepts
There are several ways to define the point at which a material begins to yield or undergo plastic deformation:
- True Elastic Limit: The lowest stress at which permanent deformation occurs, measured at microscopic levels.
- Proportional Limit: The highest stress at which stress is proportional to strain.
- Elastic Limit: The maximum stress a material can handle without permanent strain when the load is removed.
- Offset Yield Strength: The stress required to produce a specified amount of plastic deformation, commonly defined as the stress where the curve deviates from the elastic region by a set offset strain.

A good way of looking at offset yield strength is that after a specimen has been loaded to its 0.2 percent offset yield strength and then unloaded it will be 0.2 percent longer than before the test. The offset yield strength is often referred to in Great Britain as the proof stress, where offset values are either 0.1 or 0.5 percent. The yield strength obtained by an offset method is commonly used for design and specification purposes because it avoids the practical difficulties of measuring the elastic limit or proportional limit.
Some materials have essentially no linear portion to their stress-strain curve, for example, soft copper or gray cast iron. For these materials the offset method cannot be used and the usual practice is to define the yield strength as the stress to produce some total strain, for example, e = 0.005.
Conclusion
The engineering stress-strain curve is a fundamental tool in material testing, providing valuable information on material behavior under stress. It helps engineers determine the appropriate material for various applications, ensuring performance and safety. Understanding the different parameters of the curve, including tensile strength, yield strength, and ductility, is essential for making informed decisions in material selection and design.
Access Thousands of Stress-Strain Diagrams Now!
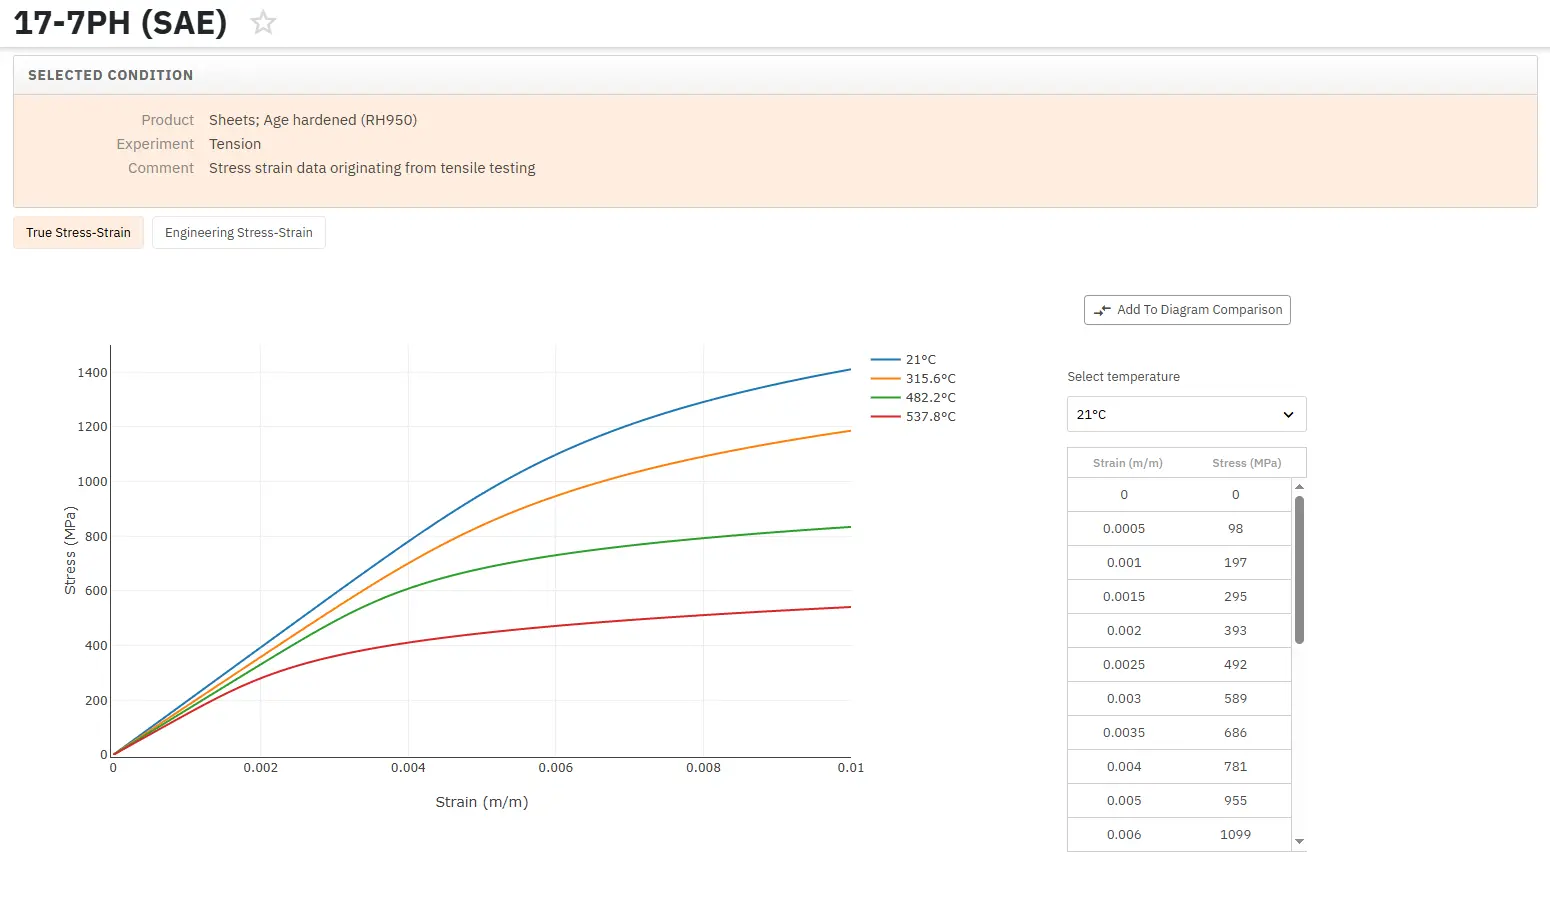
Total Materia Horizon includes a unique collection of stress-strain curves of metallic and nonmetallic materials. Both true and engineering stress curves are given, for various strain rates, heat treatments and working temperatures where applicable.

Get a FREE test account at Total Materia Horizon and join a community of over 500,000 users from more than 120 countries.